
SQL Server on Linux
Since the release candidate (RC) of SQL Server 2017 came out, it appeared that Microsoft’s database platform supported not only the Windows operating system, but also Linux and Docker containers. With this, Microsoft has broken new ground, which turns out to be very interesting for me. The ability to run SQL Server on Linux or in a Docker container brings all sorts of interesting possibilities. In this blog, I zoom in on running SQL Server in a Docker container.
Docker
Microsoft has made it very easy to start running SQL Server in Docker yourself. A number of official images have been made available on the Docker Hub (Microsoft on Docker Hub). All you have to do is start a container and point to an image from Microsoft and you have a SQL Server running.
How do you run SQL Server in Docker?
To actually run SQL Server on a Docker image, the following are required:
- A working Docker environment (see part 1 of Craig’s blog)
- A working internet connection (for bringing in the images)
Start
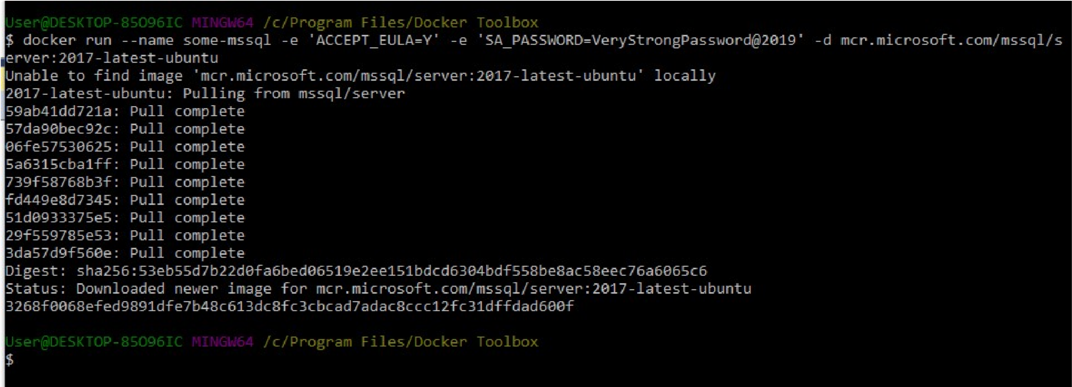
To start a new Docker image containing Microsoft SQL Server, use the following command:
docker run --name some-mssql -e 'ACCEPT_EULA=Y' -e 'SA_PASSWORD=VeryStrongPassword@2019' -d mcr.microsoft.com/mssql/server:2017-latest-ubuntu
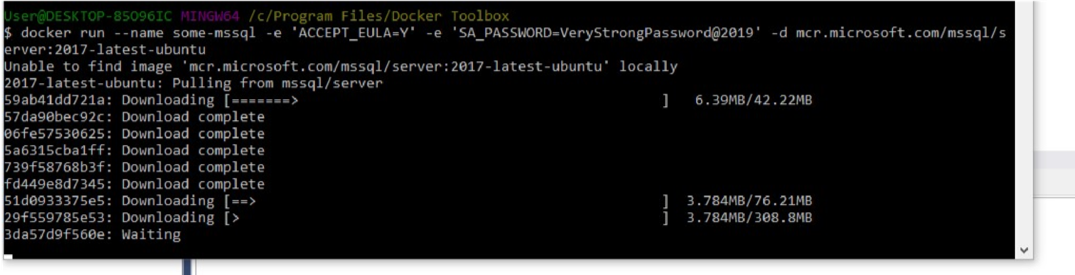
When Docker has completely finished fetching the image, it launches and returns an id of the image. Because I specified ‘some-mssql’ as the name, the image can be managed and accessed through this id as well as the name.
It works! Or does it?
I thought this meant I had a running SQL Server instance in a container because docker gave no error messages, but that turned out not to be the case. The docker ps command gives no running containers:
docker ps

When I look with docker ps -a, this command indicates that my container has the status “exited”.
docker ps -a

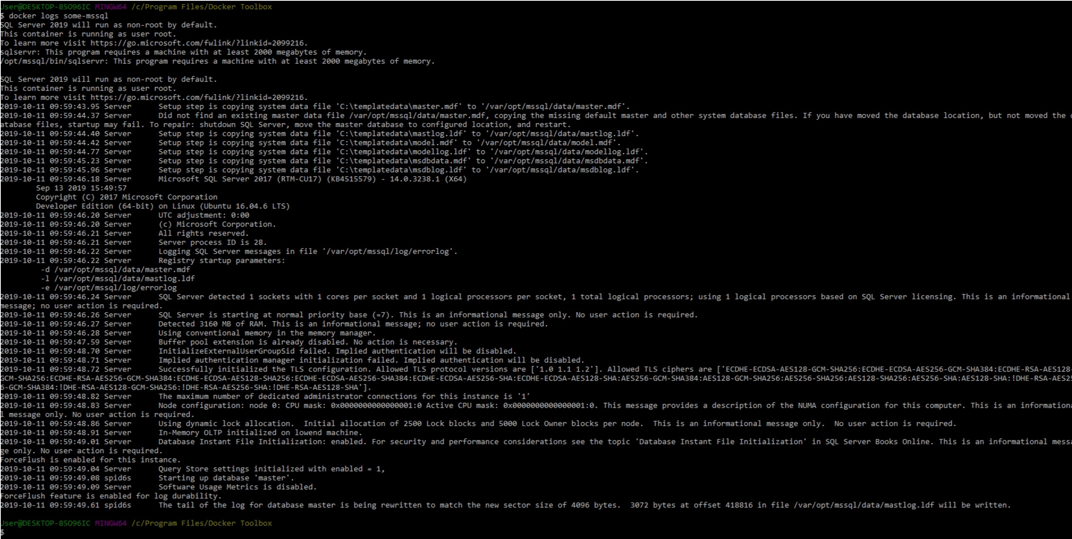
Fortunately, there is the ability to view container logs:
docker logs some-mssql
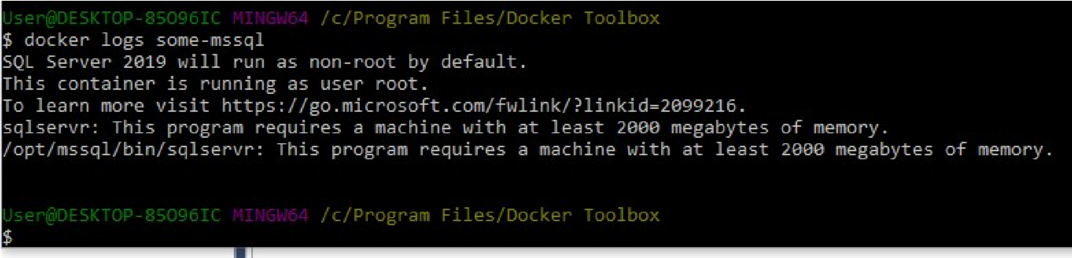
This clearly states that the container in question has too little memory to run SQL Server.
So I added some extra memory (from 1024MB to 4096MB) to my default docker machine.
Note that every time you start “clean” with docker, you may run into this problem!
After I provisioned the docker machine with extra memory and started the some-mssql container, everything looked a lot better:

And the logs:
Connecting
There are multiple ways to connect to the SQL Server instance in this container.
Directly on the container
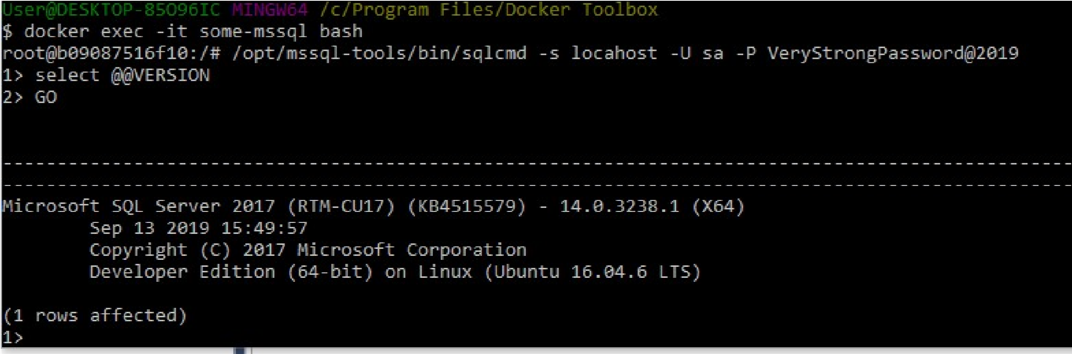
You can use the bash shell in the container, to log into the container directly:
docker exec -it some-mssql bash
You can use this to navigate within the linux container and start sqlcmd from there
SQLCMD from prompt
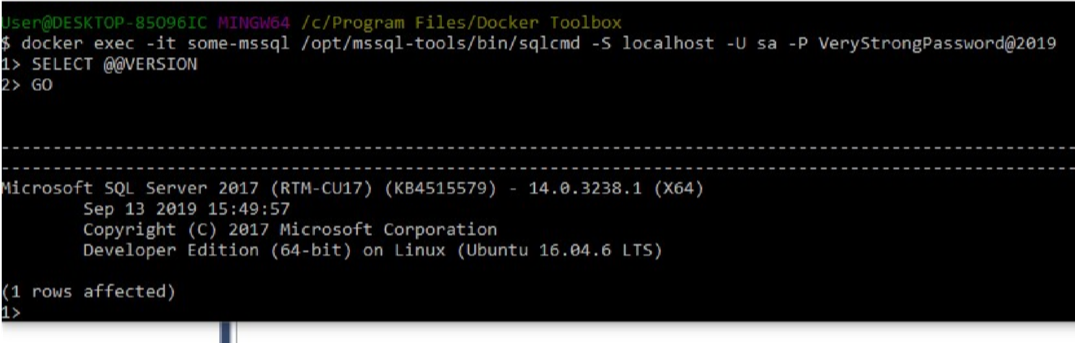
It is also possible to start sqlcmd directly from your own prompt in the container:
docker exec -it some-mssql /opt/mssql-tools/bin/sqlcmd -S localhost -U sa -P VeryStrongPassword@2019
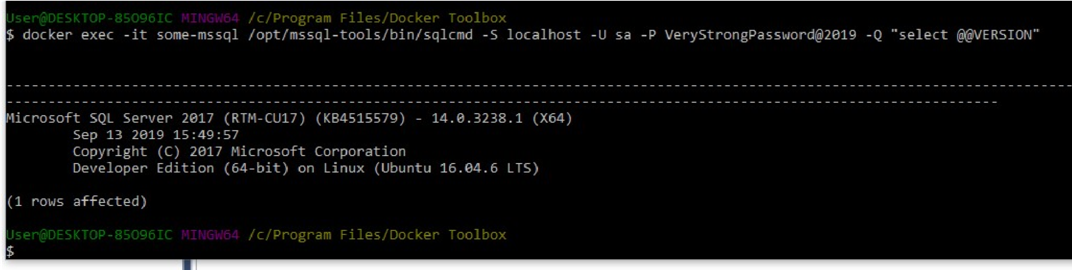
Queries from prompt
Or you can fire a query directly, without manually entering it into sqlcmd, directly from the command line where you invoke docker commands:
docker exec -it some-mssql /opt/mssql-tools/bin/sqlcmd -S localhost -U sa -P VeryStrongPassword@2019 -Q "select @@version"
Remote connecting
As currently started, it is not yet possible to access the container with tools such as SQL Server Management Studio. To get this done, a port needs to be opened to the container running SQL Server.
The default port 1433 can be used to connect to the SQL Server instance in the container. However, the container must be started differently to do this:
docker run --name some-mssql -p 1433:1433 -e 'ACCEPT_EULA=Y' -e 'SA_PASSWORD=VeryStrongPassword@2019' -d mcr.microsoft.com/mssql/server:2017-latest-ubuntu
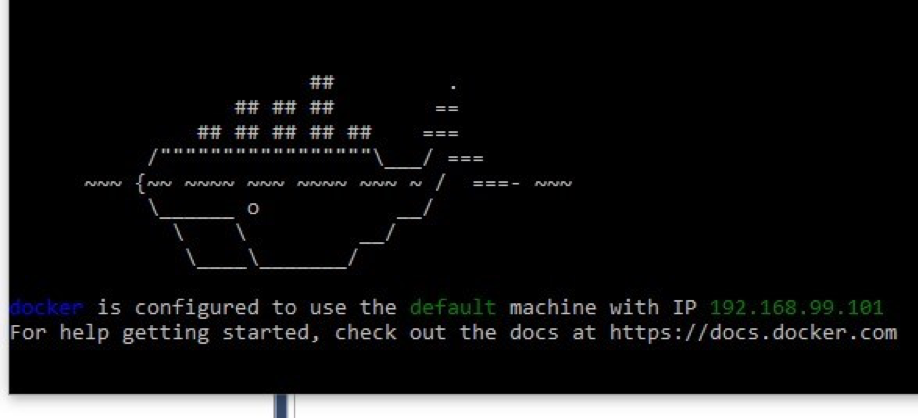
With the addition of -p, the 1433 port becomes reachable from outside the container and you can connect to the SQL Server instance in the container using, for example, a tool like SSMS. Make sure that for the hostname you use the ip address of docker (this can be seen when you start the docker console). the forwarding port you can choose yourself, this will be forwarded from your docker machine to the container. If you are going to run multiple SQL Server containers, it is a good idea to choose a different forwarding port for each one, to avoid conflicts with ports that are already in use.
Use this ip address in management studio and specify the port chosen as the forwarding port:
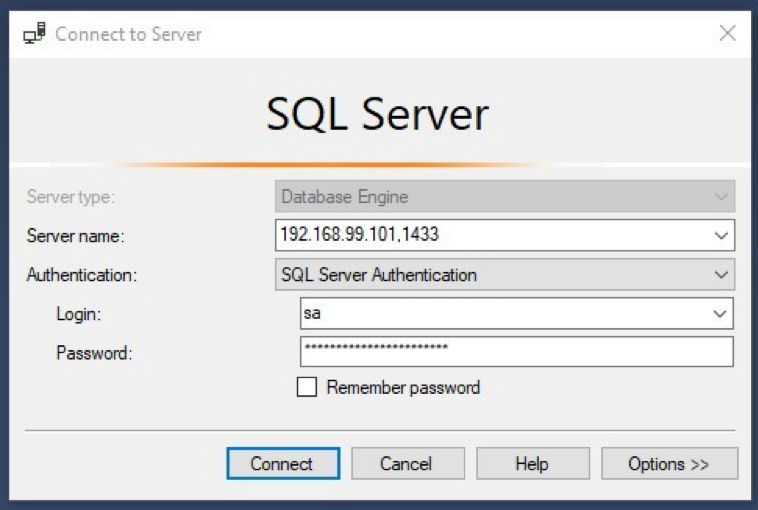
From then on, you can administer the server using SSMS as usual.
Containers + persistent storage
The advantage and disadvantage of containers is that they are volatile. When one breaks down, you just start a new one and you’re up and running again. For databases, it is very important that data is preserved even if a container breaks down. Within docker, this is handled through the use of persistent storage volumes.
To create a volume, use the command:
docker volume create vol-some-mssql-01
This volume can now be used to store the data from your SQL Server instance. SQL Server in docker uses the location /var/opt/mssql to store database files, logs and other things that need to be preserved. When I start a container and want to use a persistent volume, I need to mount it at the location of this directory, so that from then on SQL Server will write all its important data to the volume (outside the container) instead of the local disk:
docker run --name some-mssql -p 1433:1433 -v vol-some-mssql-01:/var/opt/mssql -e 'ACCEPT_EULA=Y' -e 'SA_PASSWORD=VeryStrongPassword@2019' -d mcr.microsoft.com/mssql/server:2017-latest-ubuntu

Using sqlcmd I create a database and in it I create a table.
docker exec -it some-mssql /opt/mssql-tools/bin/sqlcmd -S localhost -U sa -P VeryStrongPassword@2019 -Q "CREATE DATABASE DockerTest"
docker exec -it some-mssql /opt/mssql-tools/bin/sqlcmd -S localhost -U sa -P VeryStrongPassword@2019 -d DockerTest -Q "CREATE TABLE DockerTestTable (id int, name nvarchar(50))"

If we then discard the container and start a new one, but keep referring to the previously created volume:
docker rm some-mssql --force
docker run --name some-mssql -p 1433:1433 -v vol-some-mssql-01:/var/opt/mssql -e 'ACCEPT_EULA=Y' -e 'SA_PASSWORD=VeryStrongPassword@2019' -d mcr.microsoft.com/mssql/server:2017-latest-ubuntu
Then you will see that the database and the created table remains!
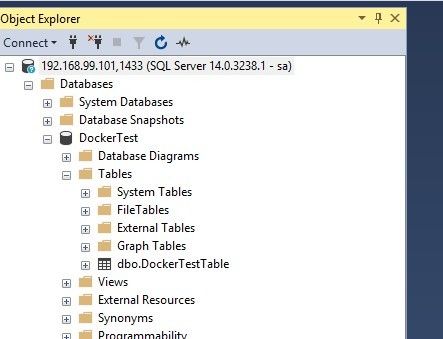
…then you will see that the database and the created table will continue to exist!
In part two of this blog, I will zoom in on the backup and restore function.